Install on Arch Linux
ilopad for Arch Linux is published as a pacman package (.pkg.tar.zst) in the ilopad repository. Add the repository once and pacman installs it and every later release, the same way it handles the rest of your system.
Install from the repository (recommended)
We recommend this method because you get updates automatically: each new release of ilopad arrives with your normal Arch Linux updates. It takes three steps.
Trust the signing key
Import the ilopad key into pacman’s keyring and sign it locally, which is what tells pacman to trust it:
Add the repository
Append the repository to /etc/pacman.conf:
Install ilopad
Refresh the package databases, update the system and install. Press Enter at each question to accept the default:
-Syu, not -Sy: Arch Linux does not support a partial upgrade. If pacman also updates the kernel (the linux package), restart the computer before you start ilopad. If you start it first, it shows Restart Needed: restart, then start it again. From now on pacman keeps ilopad current along with the rest of your system: each new release arrives with sudo pacman -Syu. Every package and every index is signed, and pacman refuses anything that does not verify.Start ilopad
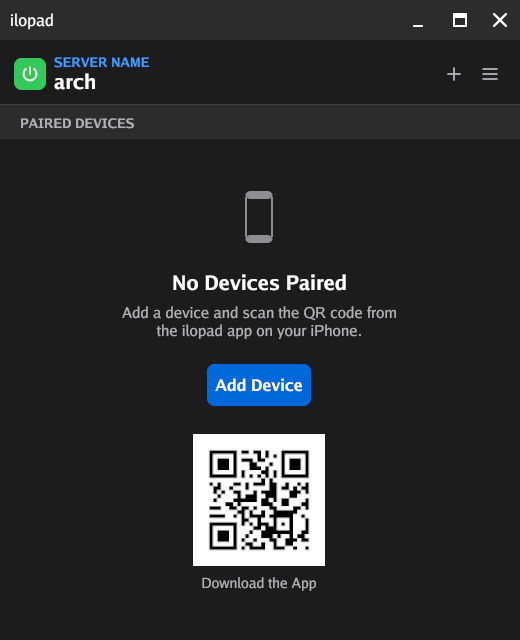
Find ilopad in your applications menu and open it. The first time, ilopad shows Permission Required: it makes a virtual mouse, keyboard and pen, and for this it needs access to the input device. Click Allow and enter your password.
The ilopad window opens. Click Add Device, give the device a name, then click Generate QR. Scan the code with the ilopad app on your iPhone to connect.
You can also start ilopad from a terminal:
Complete
That is all. Open the ilopad app on your iPad or iPhone and choose a mode: pencil, touchpad, pointer or gamepad. The user manual explains each mode.
Install a single release by hand
Use this if you would rather not add a repository. It installs one release and nothing more: ilopad will not update itself, so you repeat these steps for each new version.
Download the package
Click the button below to download the newest release for Arch Linux.
Install it with pacman
Open a terminal and install the file from your Downloads folder. pacman gets anything else that ilopad needs from the Arch Linux repositories:
Start ilopad
Find ilopad in your applications menu and open it. The first time, ilopad shows Permission Required: it makes a virtual mouse, keyboard and pen, and for this it needs access to the input device. Click Allow and enter your password.
The ilopad window opens. Click Add Device, give the device a name, then click Generate QR. Scan the code with the ilopad app on your iPhone to connect.
You can also start ilopad from a terminal:
Complete
That is all. Open the ilopad app on your iPad or iPhone and choose a mode: pencil, touchpad, pointer or gamepad. The user manual explains each mode.
Uninstall
To remove ilopad, with its settings and the permissions that it added, follow Uninstall on Arch Linux.